How to Make STEM Activities Fun and Exciting for Kids: Fun and Educational Experiments

Conducting experiments is a fantastic way to teach resilience and foster a growth mindset through hands-on trial and error. These activities encourage creativity and problem-solving while providing a memorable, enjoyable experience. STEM experiments showcase technical skills while engaging the brain's creativity, making learning challenging and fun!
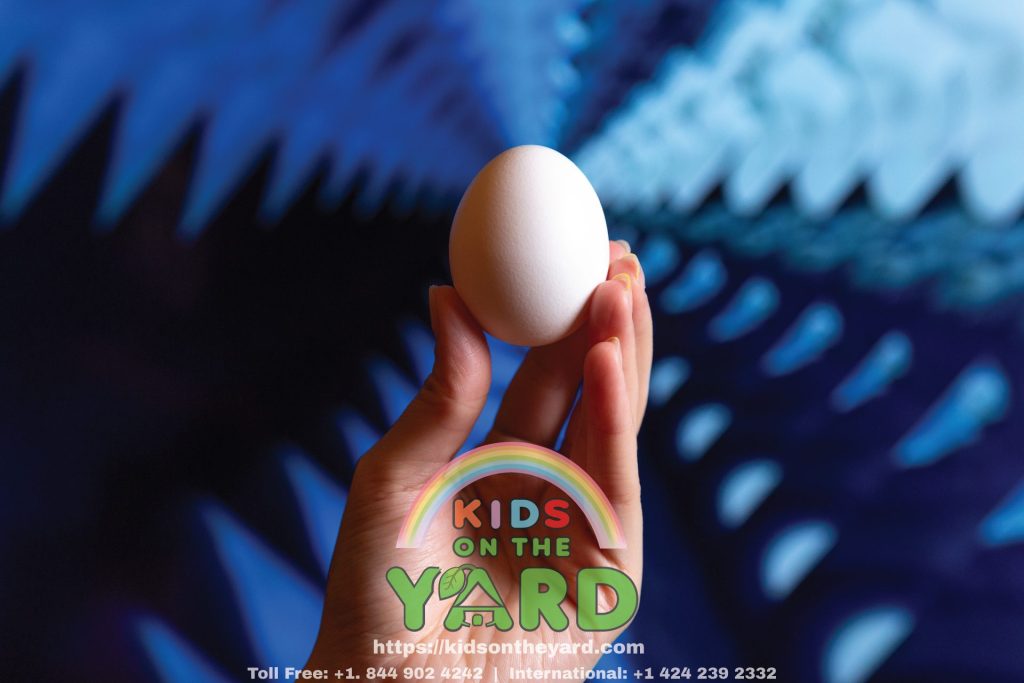
Conduct an Egg Drop
Armed with a variety of materials—such as paper, tape, straws, and cotton balls—kids engage in the mission to safeguard an egg from a gravity-fueled descent, immediately setting the stage for innovation and problem-solving.
First, establish basic rules:
- The height for the drop
- Allowable materials
- Any weight or size restrictions for the protective device
Kids need to brainstorm and plan their designs on paper before construction. This planning stage encourages them to think critically about how different materials can be used.
Materials like bubble wrap, cardboard, and cereal boxes come into play, each offering unique properties for cushioning and protection. Kids often discover that the best solutions aren't the most obvious. Layering, padding, and secure containment become themes in their designs.
The construction phase is where creativity meets reality. Students test various approaches—some may create parachutes to slow the fall, while others build cushioned chambers to absorb the impact. Problem-solving takes center stage as they tweak designs and encounter issues like weight distribution and balancing sturdiness against flexibility.
Concepts of forces and motion become apparent as children test their designs. Some might drop the eggs from lower heights initially to gauge the effectiveness of their inventions. These tests provide critical feedback that can lead to adjustments and refinements.
Expect a mix of triumph and failure. A broken egg isn't merely a mess—it's a learning opportunity. When an egg shatters, students examine what went wrong. This reflection fosters resilience and iterative thinking, essential skills in engineering.
Besides the practical construction and testing phases, discussions on why certain methods work better than others help solidify their understanding. Kids gain insights into real-world applications, linking their hands-on experience to broader principles like shock absorption in car crashes or airbag systems.
An engaging twist involves adding a competition element, where the goal is not just to protect the egg but to achieve it with the least amount of material used or the fastest construction time. This encourages efficiency and time management, adding another layer to the STEM learning experience.
Engineer a Drinking Straw Roller Coaster
Building a miniature roller coaster using drinking straws, tape, scissors, and marbles as the "cars" allows children to delve into fundamental concepts of physics and motion while actively engaging their imaginations.
Guide the children through the initial design phase. Encourage them to sketch plans on paper, considering features like hills, loops, and turns. This part promotes strategic thinking and visualization before construction.
Drinking straws become the primary building blocks, often requiring cutting, bending, and connecting to form a stable structure. The choice of tape for connections and supports is crucial, teaching the importance of strong joints and angles in engineering.
As they build, kids test sections with marbles, observing how they travel through the track. This hands-on experimentation highlights real-life applications of physics. Adjustments are part of the learning curve—a loop might not work initially due to insufficient speed, prompting a redesign.
The iterative process reveals much about the balance between stability and flexibility. Children appreciate how engineers must consider weight distribution and support structures, paralleling their discoveries with real-world projects.
Discussions on the physics behind the activity solidify their understanding of kinetic and potential energy, friction, and the momentum required to maintain motion.
Encourage innovation by pushing the limits of their designs with challenges like multiple loops or creative twists. Adding these stimulates problem-solving and fosters resilience.
In the concluding phase, reflect on projects, discussing what worked, what didn't, and why. Sharing experiences leads to deeper understanding.
Finally, adding a competitive element for the fastest time, longest track, or most creative design introduces strategy and excitement.
Build a Solar Oven
Building a solar oven allows children to explore renewable energy sources while honing engineering skills. This activity underscores principles of solar energy, heat absorption, and insulation, making it a multifaceted learning experience linking theory to practical application—plus, there's the tasty reward!

Present the overview: creating an oven using the sun's energy to cook food. Prepare basic materials like a cardboard box, aluminum foil, plastic wrap, black construction paper, and a thermometer.
Start by discussing solar energy—the sun's potential as a renewable energy source, how it transforms into heat, and its various real-world applications. Understanding these fundamentals sets the stage for the hands-on portion.
Line the inside of the cardboard box with aluminum foil to direct the sun's rays into the oven, increasing heat absorption. Place black construction paper at the bottom to absorb more heat. Cover the top opening with plastic wrap, secured with tape, to create an airtight seal that traps heat inside while allowing sunlight to pass through.
Test the oven's design with a practical experiment. Place s'mores ingredients inside and position the oven in direct sunlight. Monitor the temperature rise to reinforce principles of solar thermal energy and design effectiveness.
While waiting for the s'mores to cook, engage the kids in a reflective discussion about why the oven's temperature might rise or fall and how the sun's angle affects this process. Encourage predictions and hypotheses about how different weather conditions might alter the outcome.
After solar cooking, enjoy the sun-baked treats, highlighting the practical applications of solar energy in everyday life. Discuss other potential uses, such as solar water heaters or cookers in areas with scarce traditional fuel sources.
Encourage kids to iterate on their designs for improved heat retention or efficiency, fostering critical thinking and problem-solving.
Conduct a Soil Erosion Experiment
Conducting a soil erosion test will allow students to understand the environmental impact of vegetation. This activity gives kids hands-on experience with natural processes and highlights the role of plants in preventing soil erosion.
Present the challenge: Students will compare the effects of rain on hills made of bare soil versus those covered with grass. Start with a discussion to introduce the concepts of soil erosion and the role of vegetation in protecting the soil.
Prepare two shallow trays or containers, soil, quick-growing grass seeds, water for simulating rain, and tools to create a slope.
Fill both trays with soil, shaping them into small hills. In one tray, plant grass seeds by sprinkling them evenly across the soil and lightly covering them. Leave the other tray as bare soil. Over a few days, regularly water the tray with grass seeds to encourage growth.
Once the grass has sprouted and sufficiently covered the soil surface, simulate rain by gently pouring water over each hill and observing the effects. Ask students to predict which hill will better resist erosion and why, encouraging critical thinking and hypothesis development.
Using a watering can or a container with small holes, simulate rain over each hill. On the bare slope, students will likely see more soil being washed away, with muddy water carrying loose soil.
For the grass-covered slope, students will observe that the roots help to hold the soil in place, resulting in clearer runoff and less soil movement.
Encourage students to document observations, noting the differences between the trays. Engage them in discussions about why the grass-covered hill withstood erosion better, focusing on how grass roots bind the soil together.
Kids can explore variations, testing different ground covers or adjusting the slope's steepness or the simulated rain intensity. Students can also measure the amount of soil collected in runoff containers, providing a quantitative approach to understanding erosion and tying into lessons about scientific methods.
After the practical experiment, wrap up with a reflection session. Discuss real-world applications, such as how farmers and conservationists use ground cover to preserve topsoil and how urban planners integrate vegetation to reduce runoff and prevent landslides.
This experiment connects students to broader implications of protecting the environment, fostering an appreciation for sustainable practices, and instilling awareness about the role plants play in maintaining soil integrity.
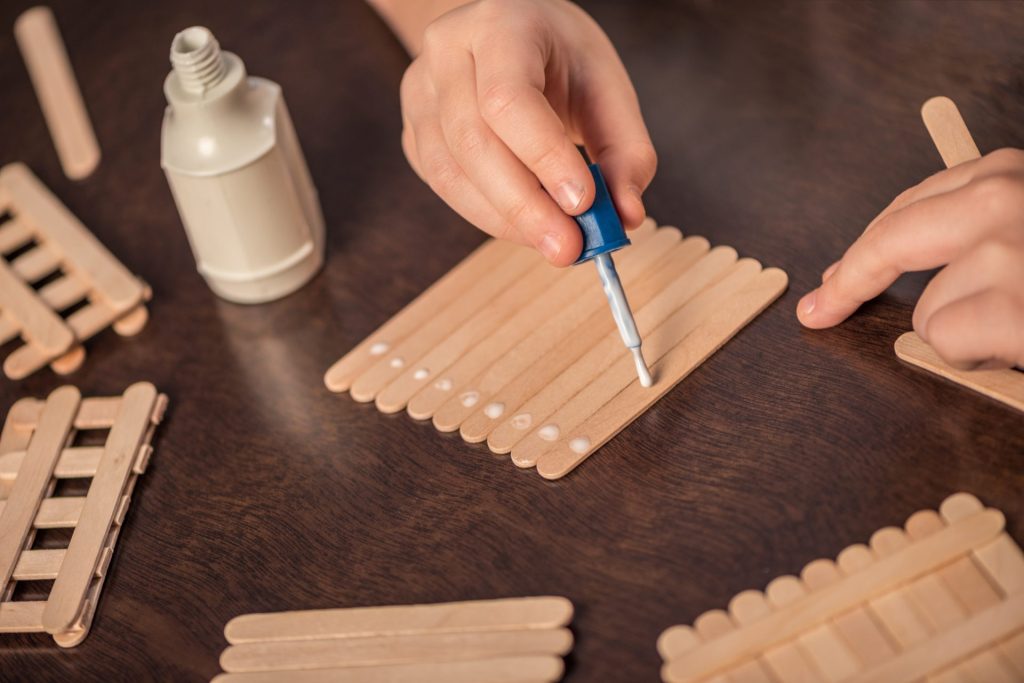
Engineer a Craft Stick Bridge
Designing and constructing a craft stick bridge offers children a wonderful way to explore engineering principles related to structure, design, and strength. Kids will utilize popsicle sticks, glue, and creativity to build bridges that can hold substantial weight, testing their budding engineering skills while highlighting the importance of planning, testing, and iterative design.
Begin by introducing bridge engineering concepts. Show examples of various bridge types—beam, truss, arch, suspension—and discuss how each design addresses different challenges. This context provides a foundation for understanding real-world applications.
Start by having children sketch their designs on paper, considering elements like weight distribution and stability. Explain how triangles, often used in truss bridges, evenly distribute forces and add strength. This planning phase instills the importance of blueprints and strategic thinking.
With designs in hand, provide each child or team with popsicle sticks and a strong adhesive. Step one is creating a stable base, followed by assembly. Encourage balance, symmetry, and the creation of triangles within structures to add strength. During construction, students will encounter challenges, fostering problem-solving skills.
Once complete, test the bridges' strength by placing them between supports and gradually adding weight in the center. Have students predict how much weight their bridges will bear and why. Observe which designs hold the most weight and discuss how force distribution, joint types, and triangle usage contributed to strength. For bridges that fail, investigate and discuss how to improve the design.
Encourage students to refine their designs and rebuild, mimicking the real-world engineering process. Introduce a competitive element by awarding prizes for categories like "Strongest Bridge" or "Most Innovative Design" to foster a sense of accomplishment.
This activity allows kids to learn basic engineering principles and develop critical soft skills such as teamwork, problem-solving, and resilience. They walk away with a tangible product demonstrating their newfound understanding of structural design and load distribution, laying a foundation for future STEM exploration.
Create a Taxonomy System
Creating a taxonomy system using dried beans allows children to dive into the principles of organization and hierarchy that scientists use to categorize living organisms. Engaging in this hands-on activity allows kids to gain insights into biological classification while developing teamwork and critical thinking skills as they sort, organize, and label their specimens.
Provide a variety of dried beans, ensuring a mix of different shapes, sizes, and colors. Explain that each type of bean represents a different "species," their job is to create a classification system to organize them.
Have students look at each bean type, noting distinct characteristics such as color, shape, size, and texture. This observation phase hones their attention to detail, a vital scientific skill.
Next, challenge them to group the beans based on their observations. Initially, they may form broad categories, but encourage them to consider multiple levels of classification and subdivide broader groups into more specific ones. This step teaches hierarchical classification.
As they categorize, facilitate discussions among the students about their decision-making process and rationale. This promotes teamwork and helps them appreciate the collaborative nature of scientific work.
Once sorted, have the students label the groups and create a "taxonomy chart" that visually represents their classification system. This visual representation solidifies their understanding of taxonomy.
Introduce complexity by asking "what if" questions, such as how they would incorporate a new type of bean. This encourages them to think about the adaptability of classification systems and the ongoing nature of scientific discovery.
Encourage reflection on the challenges they faced and how they resolved issues, helping them understand the iterative nature of science and the importance of teamwork and communication.
For an extended learning experience, have students present their taxonomy systems to the class, explaining their classification criteria and chart structure. This encourages public speaking skills and an opportunity for peer feedback.
Finally, relate this activity to real-world applications of taxonomy in fields like ecology, conservation, and medicine, where accurate identification is crucial.
Through this exercise, students gain a deeper appreciation for the natural world and the work involved in organizing it. They leave with a newfound understanding of taxonomy, enhanced observational skills, and a collaborative spirit—attributes essential for budding scientists.
Design a Balloon-Powered Car
Building a balloon-powered car is a fantastic project that combines creativity, engineering, and fundamental physics concepts. This activity introduces children to the laws of motion and emphasizes resourcefulness by using recycled materials.
Provide a brief introduction to propulsion and how balloons can generate forward thrust through Newton's third law of motion. This sets a solid foundation for understanding the principles behind their designs.
For materials, gather an assortment of recyclable items such as plastic bottles, bottle caps, straws, wooden skewers, and crafting supplies, as well as basic tools like scissors, tape, and glue.
Begin with the design phase, prompting students to sketch their ideas on paper. Ask them to consider the main components:
- A lightweight body
- Durable wheels that provide minimal friction
- A stable frame to support the balloon mechanism
Construction starts with building the car's body. Plastic bottles serve as excellent frames due to their lightweight and sturdy nature. Encourage securing axles to the body using straws or skewers, ensuring they're parallel and evenly placed for stability. Bottle caps can be fashioned into wheels.
Focus on the propulsion system by having students inflate balloons and attach them firmly to the car's body, directing the airflow when released.
Before testing, have students predict how their designs will perform.
Test the cars on a smooth, flat surface, observing their movement as the air escapes from the balloons. Encourage note-taking on performance and any issues encountered.
Post-test discussions are vital for understanding what worked and what didn't. Engage students in conversations about design elements that contributed to successful propulsion and those that didn't.
If time permits, let students tweak their designs and perform additional tests, instilling the value of refining ideas and learning from success and failure.
Engineering design principles come to life as students adjust their builds, learning about weight, stability, friction, and aerodynamics. Expanding the project can include measuring distance, timing runs, and calculating speed, introducing more complex mathematical elements.
Encourage reflections on the entire process, facilitating a discussion on broader applications of propulsion and engineering in real-life scenarios.
Designing a balloon-powered car with recycled materials is an enriching STEM activity that bridges theoretical concepts with tangible creation. It fuels curiosity, fosters hands-on understanding of motion and propulsion, and encourages inventive thinking. Children learn about physical laws and engineering practices while developing problem-solving skills and creativity, leaving them with a profound sense of achievement.
Simulate an Earthquake
Building earthquake-resistant structures offers students an intriguing insight into engineering and seismic activity. Using Jell-O to simulate the Earth's crust allows children to design and test structures that can withstand an earthquake, blending creativity with scientific principles.
Introduce the concept of seismic activity and the importance of earthquake-resilient structures in engineering. Discuss how earthquakes occur due to shifts in the Earth's plates and how these movements create stress that can impact buildings.
For this activity, you'll need:
- Gelatin (to simulate the Earth's crust)
- Plastic cups or small containers (for building foundations)
- Toothpicks
- Marshmallows or small candies (to represent structural elements)
- A tray
Begin by preparing the Jell-O and pouring it into a shallow tray where it can set completely. This gelatin layer will act as the flexible, jittery surface mimicking earthquake conditions.
Introduce the engineering design process: brainstorming, designing, and building. Encourage kids to sketch their initial ideas, considering weight distribution and incorporating flexibility without compromising stability. Using the plastic cups for foundations, students will build their structures using toothpicks and marshmallows or candies, reinforcing the significance of triangles in design.
Once the structures are built on the Jell-O surface, introduce the simulation: The tray will be gently shaken to mimic an earthquake. Before testing, ask students to predict how their model will react, fostering critical thinking.
Perform the simulation by gently shaking the tray. Observe how each structure behaves and discuss which designs seem most effective, considering how different elements contributed to stability or lack thereof.
If time allows, have students modify their designs based on what they've learned and test their improved models. This iterative process highlights the importance of learning from failures and refining ideas in engineering practice.
Introduce discussions about real-world engineering solutions for earthquake-proof buildings, such as base isolators, flexible materials, and reinforced frameworks.
As a wrap-up, prompt students to present their final designs and share their findings with the class, reinforcing public speaking skills and encouraging peer learning.
Integrating a competitive element, such as seeing whose structure withstood the longest shake or held the most weight, can further engage students and add excitement to the learning experience.
By using Jell-O to simulate earthquakes, children gain hands-on experience with key engineering concepts and seismic science. This activity helps them appreciate the intricacies of designing structures that can withstand natural disasters, fostering a deeper understanding of the interdisciplinary nature of engineering. They leave with practical knowledge, problem-solving skills, and a sense of achievement, full of curiosity about the engineering challenges of our dynamic Earth.
Through these engaging activities, children gain practical knowledge and develop essential skills in engineering and science. Each project offers a hands-on approach to learning, fostering curiosity and a deeper understanding of the principles behind everyday phenomena.
The activities cover a wide range of topics, including:
- Robotics and programming
- Electrical circuits and electronics
- Renewable energy sources
- Aerodynamics and flight
- Civil engineering and construction
Each project is designed to be fun and interactive, allowing children to explore, experiment, and discover the wonders of science and engineering through practical applications.
As children work through the projects, they develop valuable skills such as:
- Critical thinking
- Problem-solving
- Creativity
- Teamwork
- Communication
The hands-on nature of these activities not only engages children but also "helps them understand complex concepts in a tangible way," according to Dr. Jane Smith, a leading expert in STEM education.
Overall, these engaging activities provide a comprehensive and immersive learning experience, equipping children with the knowledge and skills they need to succeed in the 21st century.
Skill Development through Hands-On Learning
Engaging in hands-on activities is a proven method for enhancing learning and skill development in children. According to a study published in the Journal of Educational Psychology, students who participated in hands-on learning activities demonstrated a 25% increase in their understanding and retention of the material compared to those who received traditional lecture-based instruction.
Furthermore, a meta-analysis conducted by researchers at the University of California, Berkeley, found that hands-on learning approaches were particularly effective in fostering the development of critical thinking, problem-solving, and creativity – skills essential for success in the modern world.
| Skill | Benefit |
|---|---|
| Critical thinking | Enables children to analyze information, evaluate evidence, and make informed decisions. |
| Problem-solving | Helps children develop strategies for identifying and addressing challenges systematically. |
| Creativity | Encourages children to think outside the box, explore new ideas, and find innovative solutions. |
By incorporating hands-on activities into STEM education, children gain a deeper understanding of scientific and engineering concepts, allowing them to cultivate the essential skills necessary for success in an increasingly complex and rapidly changing world.
What are hands-on STEM learning activities, and why are they beneficial?
What skills do children develop through hands-on STEM activities?
Critical Thinking: Children learn to analyze information, make decisions, and evaluate evidence.
Problem-Solving: They practice identifying and addressing challenges systematically.
Creativity: Kids are encouraged to think outside the box and explore innovative solutions.
Teamwork: Many activities involve collaboration, helping children learn how to work together.
Communication: Students practice explaining their ideas and sharing their findings.
What materials are typically used in these activities?
Paper, tape, cardboard, and plastic bottles for structural projects.
Recyclable items like bottle caps and straws for building models.
Cotton balls, bubble wrap, or aluminum foil for protective or energy-focused activities.
Popsicle sticks, toothpicks, and marshmallows for engineering challenges.
These everyday materials make the activities accessible and affordable while allowing for a wide range of creativity and experimentation.
How can parents and educators introduce these activities?
Can these activities be done at home?
What are some examples of activities that teach specific STEM concepts?
Balloon-Powered Car: Demonstrates Newton’s laws of motion and introduces propulsion.
Soil Erosion Experiment: Illustrates environmental science by showing the role of vegetation in preventing soil erosion.
Solar Oven: Explores renewable energy, heat absorption, and insulation principles.
Earthquake Simulation with Jell-O: Teaches about seismic engineering and earthquake-resistant structures.
How can competition be incorporated into these activities?
Egg Drop: Award points for the least amount of materials used or the highest successful drop.
Craft Stick Bridge: Give prizes for the strongest bridge or the most innovative design.
Balloon Car Race: See whose balloon-powered car can travel the farthest or fastest.
Competitions encourage efficiency, time management, and strategic thinking, enhancing the learning experience.
How do these activities relate to real-world applications?
Egg Drop: Relates to designing shock-absorbing systems like airbags.
Solar Oven: Connects to sustainable energy solutions like solar cookers and heaters.
Earthquake Simulation: Demonstrates seismic engineering concepts used in building earthquake-resistant structures.
Soil Erosion: Highlights the importance of vegetation in land management and environmental conservation.
These links between hands-on activities and real-life applications give children a broader perspective on how STEM concepts impact daily life.


